Attaching magnetic clasps to jewelry
When it comes to elevating your handmade jewelry, few components are as game-changing as magnetic clasps. These tiny powerhouses not only add a touch of elegance to your creations but also make putting on and taking off jewelry a breeze.
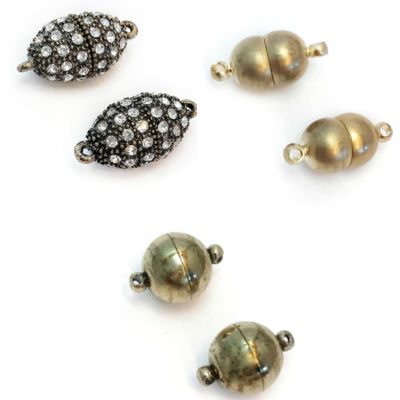
Magnetic Clasps in Jewelry Making
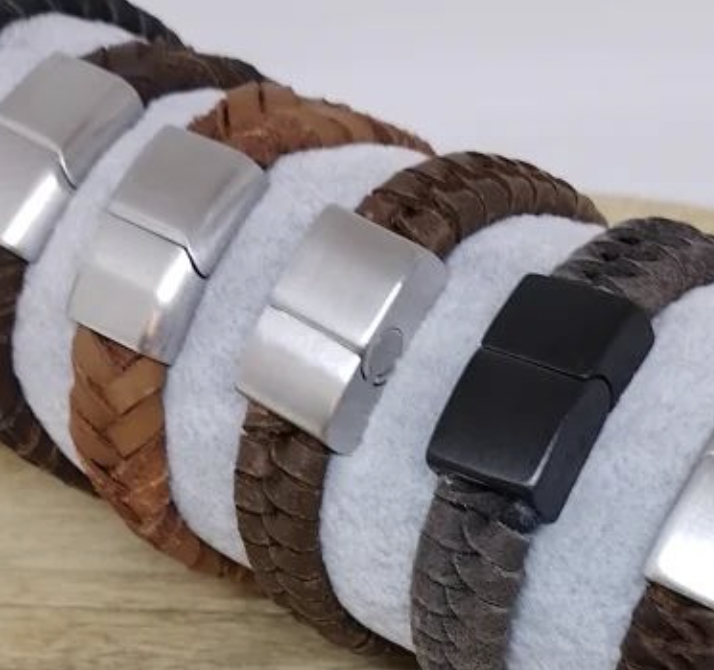
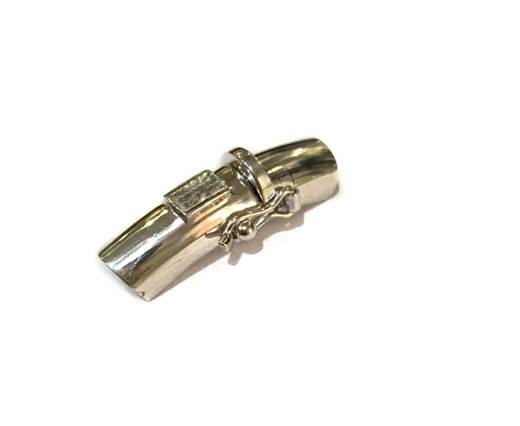
Magnetic clasps are a sleek and practical alternative to traditional clasp types like lobster claws or spring rings. Designed with strong magnets, these clasps secure your jewelry pieces effortlessly. They're especially popular for bracelets and necklaces, providing an easy-to-use yet secure closure mechanism.
You can read an in-detail blog about the magnetic clasps on our website: Introduction to Magnetic clasps
Step-by-Step Guide to Attaching Magnetic Clasps to Different Types of Jewelry
Attaching magnetic clasps to your jewelry might seem daunting at first, but it’s quite straightforward once you know the steps. Here, we'll walk you through the process for different types of jewelry, including bracelets and necklaces.
Detailed Guide to Attaching Magnetic Clasps to Bracelets
Materials Needed:
- Bracelet: Ensure you have the bracelet you want to modify.
- Magnetic Clasp: Choose a high-quality magnetic clasp that suits your bracelet style.
- Jump Rings: Select jump rings that are strong enough to hold the clasp securely.
- Crimp Beads: Use crimp beads that match your wire gauge for a secure fit.
- Pliers: Needle-nose pliers are ideal for manipulating small components.
- Wire Cutters: Sharp wire cutters for precise trimming of excess wire.
Step-by-Step Instructions:
- Prepare Your Materials:
- Gather all materials on a clean, flat surface to keep everything organized.
- Make sure your work area is well-lit to avoid losing small components.
- Attach the Jump Ring:
- Take a jump ring and hold it with your pliers.
- Twist the ends of the jump ring apart gently, rather than pulling them apart, to maintain its shape.
- Slide the jump ring through the loop on one end of the magnetic clasp.
- Secure the Clasp:
- Insert the end of your bracelet wire through the jump ring.
- Add a crimp bead onto the wire, followed by pulling the wire back through the crimp bead to form a loop.
- Use your pliers to flatten the crimp bead securely, ensuring the wire is firmly held in place. Make sure you press down evenly to avoid damaging the bead.
- Trim Excess Wire:
- After securing the crimp bead, use wire cutters to snip any excess wire close to the crimp bead. Be cautious not to cut the crimp bead itself; leave a tiny bit of wire if necessary to ensure stability.
- Repeat on the Other Side:
- Take the other half of the magnetic clasp and repeat the process on the opposite end of the bracelet.
- Open another jump ring and attach it to the clasp, then thread the wire through the jump ring and crimp bead.
- Secure it by flattening the crimp bead as you did previously.
- Test the Clasp:
- Once both sides are attached, gently pull on the clasp to ensure it fastens securely.
- Check the release mechanism to ensure it opens easily without excessive force. A properly attached magnetic clasp should snap together with a satisfying click and release smoothly.
Detailed Guide to Attaching Magnetic Clasps to Necklaces
Materials Needed:
- Necklace: Ensure your necklace is ready for modification.
- Magnetic Clasp: Choose a clasp that suits the design and weight of your necklace.
- Jump Rings: Ensure you have strong jump rings that complement your clasp.
- Crimp Beads: Pick crimp beads that match the thickness of your necklace wire.
- Pliers: Use needle-nose pliers for precision.
- Wire Cutters: Ensure your wire cutters are sharp for a clean cut.
Step-by-Step Instructions:
- Prepare Your Materials:
- Lay out all components on a flat, organized workspace.
- Double-check that you have everything you need before starting the process.
- Attach the Jump Ring:
- Hold a jump ring with your pliers and gently twist the ends apart to open it.
- Slide it through the loop on one side of the magnetic clasp.
- Secure the Clasp:
- Feed the end of your necklace wire through the jump ring.
- Add a crimp bead, then pull the wire back through the crimp bead to create a loop.
- Use your pliers to flatten the crimp bead securely, ensuring the wire is tightly held without damaging the bead itself.
- Trim Excess Wire:
- Once the crimp bead is secure, use wire cutters to carefully trim any excess wire close to the crimp bead, ensuring you don’t cut into the crimp bead.
- Repeat on the Other Side:
- Attach the other half of the magnetic clasp to the opposite end of the necklace using another jump ring and crimp bead.
- Repeat the steps of threading the wire through the jump ring and crimp bead, securing it as previously done.
- Test the Clasp:
- After both halves are secured, pull gently on the clasp to ensure it locks in place.
- Make sure the clasp releases easily and securely; it should click together firmly without requiring too much force.
By following these detailed steps, you can successfully attach magnetic clasps to your bracelets and necklaces, enhancing their functionality and ease of use. Enjoy your beautifully crafted jewelry!
By following these steps, you can easily attach magnetic clasps to your jewelry pieces, ensuring they are both functional and stylish.

Tips for Choosing the Right Magnetic Clasp for Your Design
Selecting the right magnetic clasp is crucial for the overall success of your jewelry piece. Here are some tips to help you make the best choice:
Consider the Weight of Your Jewelry
Heavier pieces, such as chunky necklaces or bracelets with large beads, require stronger magnetic clasps. Look for clasps that are specifically designed to hold more weight to ensure they stay secure.
Match the Style
Your clasp should complement the overall design of your jewelry. For minimalist designs, opt for sleek, simple magnetic clasps. For more intricate pieces, consider ornate clasps with decorative elements.
Choose the Right Size
The size of the clasp should be proportional to the size of your jewelry. A clasp that's too small may not be able to hold the piece securely, while an oversized clasp can look bulky and out of place.
By considering these factors, you can select the perfect magnetic clasp that enhances both the functionality and aesthetics of your jewelry creation.
Troubleshooting Common Issues When Attaching Magnetic Clasps
Even with the best tools and materials, you might encounter some challenges when attaching magnetic clasps. Here are common issues and how to resolve them:
Weak Magnetism
If the magnetic clasp doesn't seem to hold well, it may be due to weak magnetism. Ensure you're using high-quality clasps, like those from Sun Enterprises, which are known for their strong magnetic hold.
Difficulty Opening/Closing Clasp
Sometimes, magnetic clasps can be too strong, making them hard to open or close. In this case, gently pry the magnets apart using your nails or a flat tool, and practice until it becomes easier to handle.
Loose Connections
If the clasp feels loose or wobbly, double-check your jump rings and crimp beads to ensure they're properly secured. Tighten any loose connections with your pliers and make sure the crimp beads are flattened and holding the wire firmly.
By addressing these issues, you can ensure your magnetic clasps are both secure and easy to use.
Final Thoughts and Encouragement for Creative Experimentation
Integrating magnetic clasps into your jewelry-making repertoire can open up new possibilities for your designs. Their ease of use, security, and aesthetic appeal make them a valuable addition to any jewelry maker's toolkit. Don't be afraid to experiment with different styles, materials, and techniques to find what works best for you.
Conclusion
Ready to get started? Check out Sun Enterprises for high-quality magnetic clasps and other jewelry components to enhance your creations. Share your experiences and designs with our community—we'd love to see what you create!
Happy crafting!