Macrame is back on trend, and you should definitely learn how to do it! If you haven’t read our previous blogs, we invite you to click here and here to know everything about macrame.
By following these 7 easy steps you ill learn to do macramé like a pro!
All you’ll need is
- 0.5mm cords (waxed cotton, leather, silk…)
- A charm or a connector or a ring
- A needle or a similar tool to separate the knotted cords
- Scissors
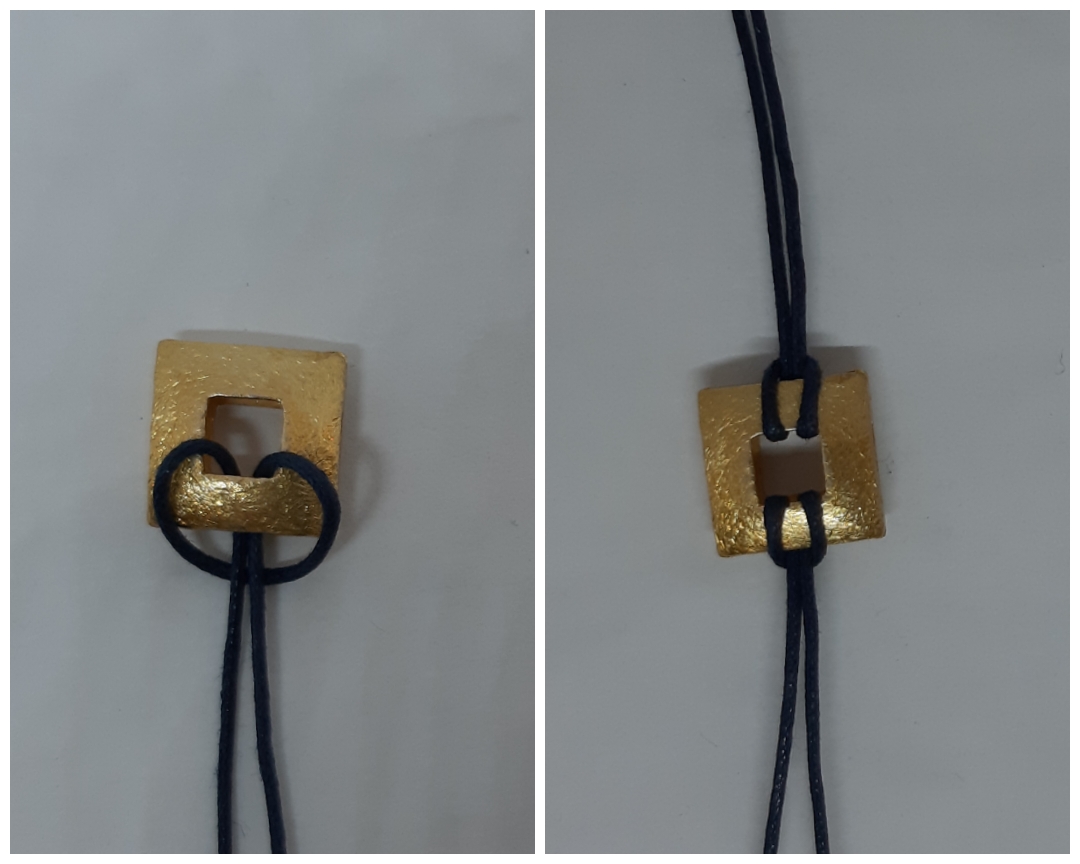
Step 1:
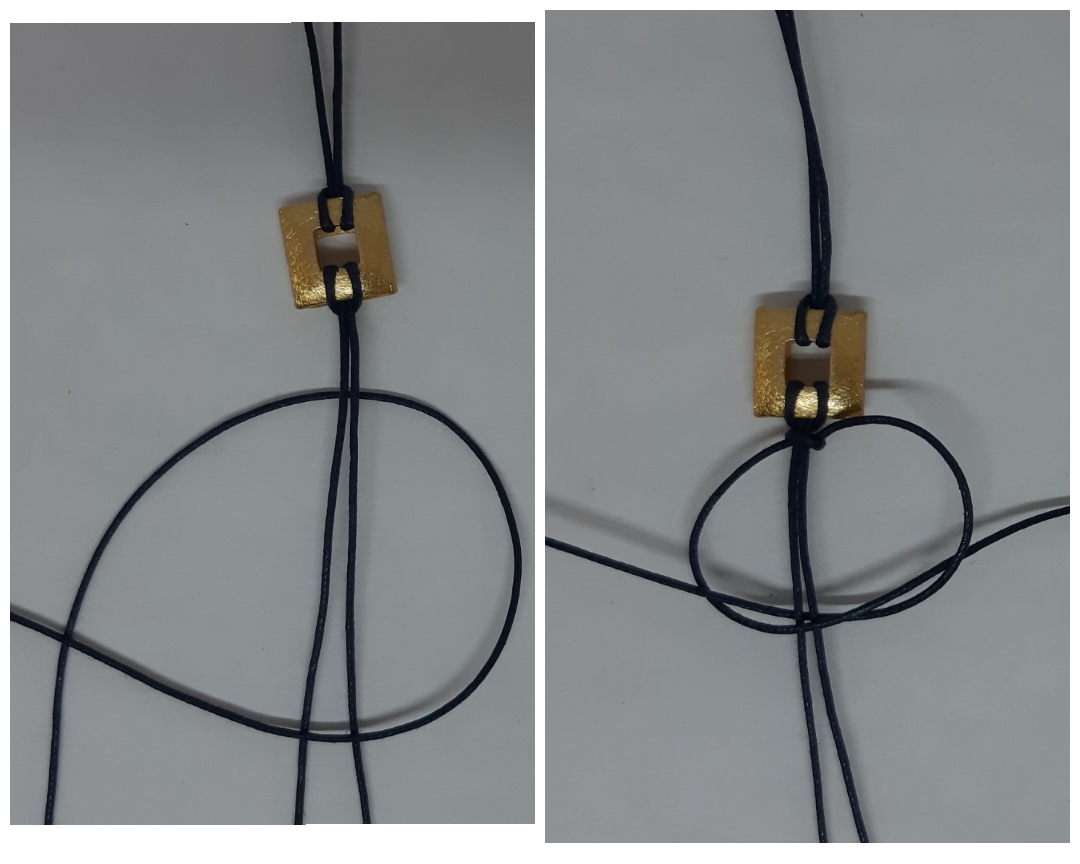
Cut 4 yards of cords, two of 75cm, two of 50cm and one of 25cm. Fold the 50cm cord and knot it around the charm as you can see in the picture. Do the same for the other 50cm cord on the opposite part of the charm.
Step 2:
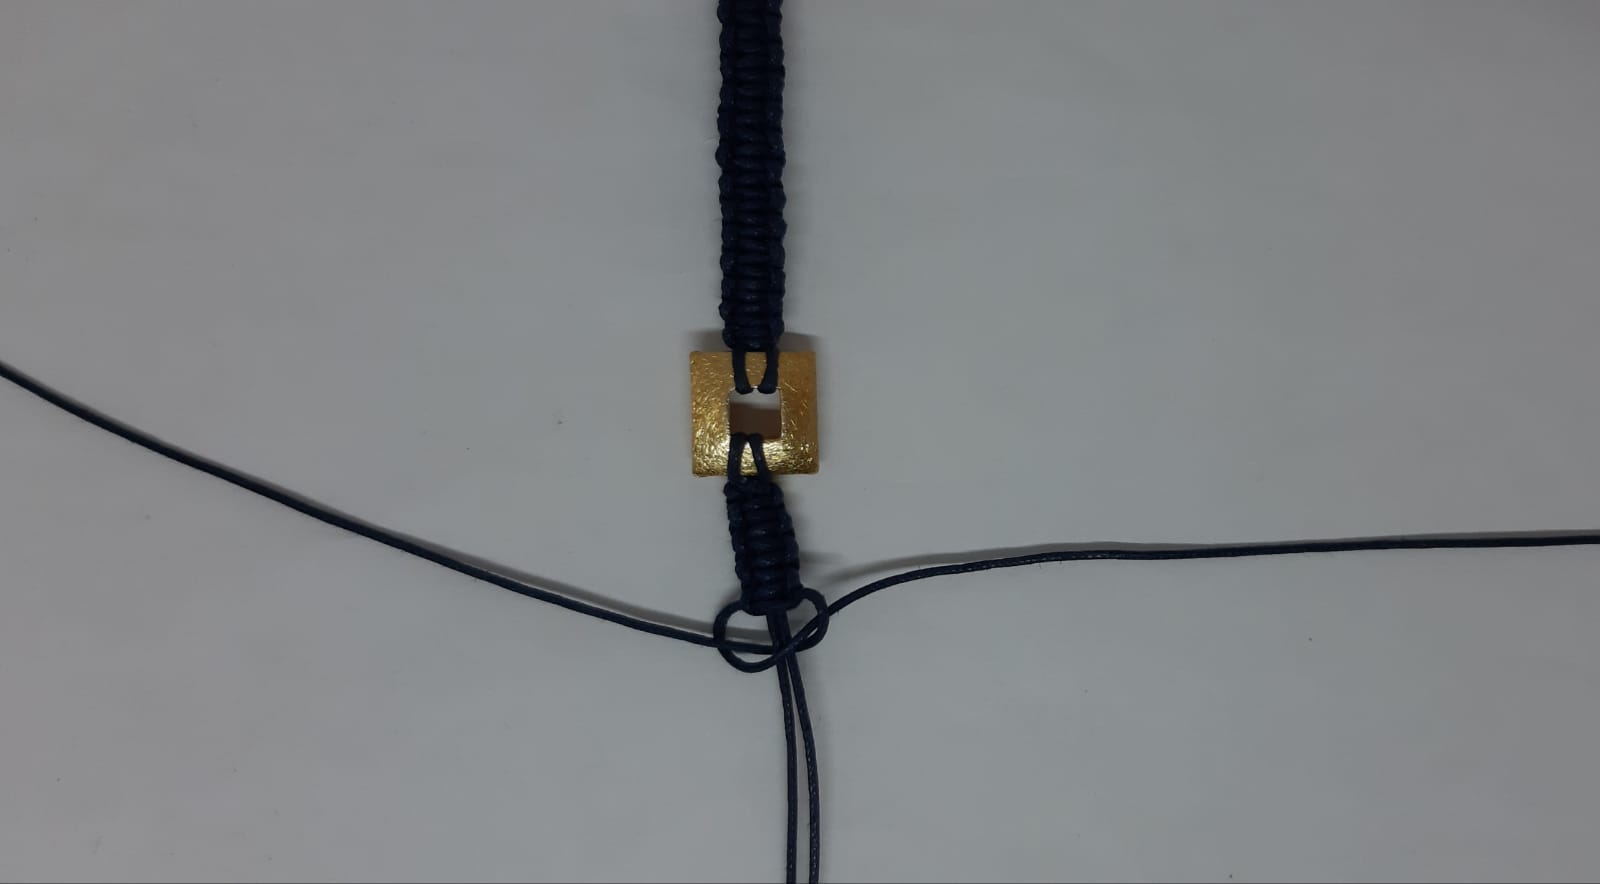
Take the 75cm cord and start knotting it around the cords attached to the charm like the following: Slide the 75cm cord under the two middle strands and fold the right cord over the middle strands and under the left cord, then fold the left cord behind the middle strands and over the right cord. Pull the knot tight.
Step 3:
Repeat the same knot but by inversing the process: start by folding the left cord over the middle strands, then fold the right cord behind the middle strands and over the left cord. Repeat the process and alternate the sides at every knot (right, left, right, left…)
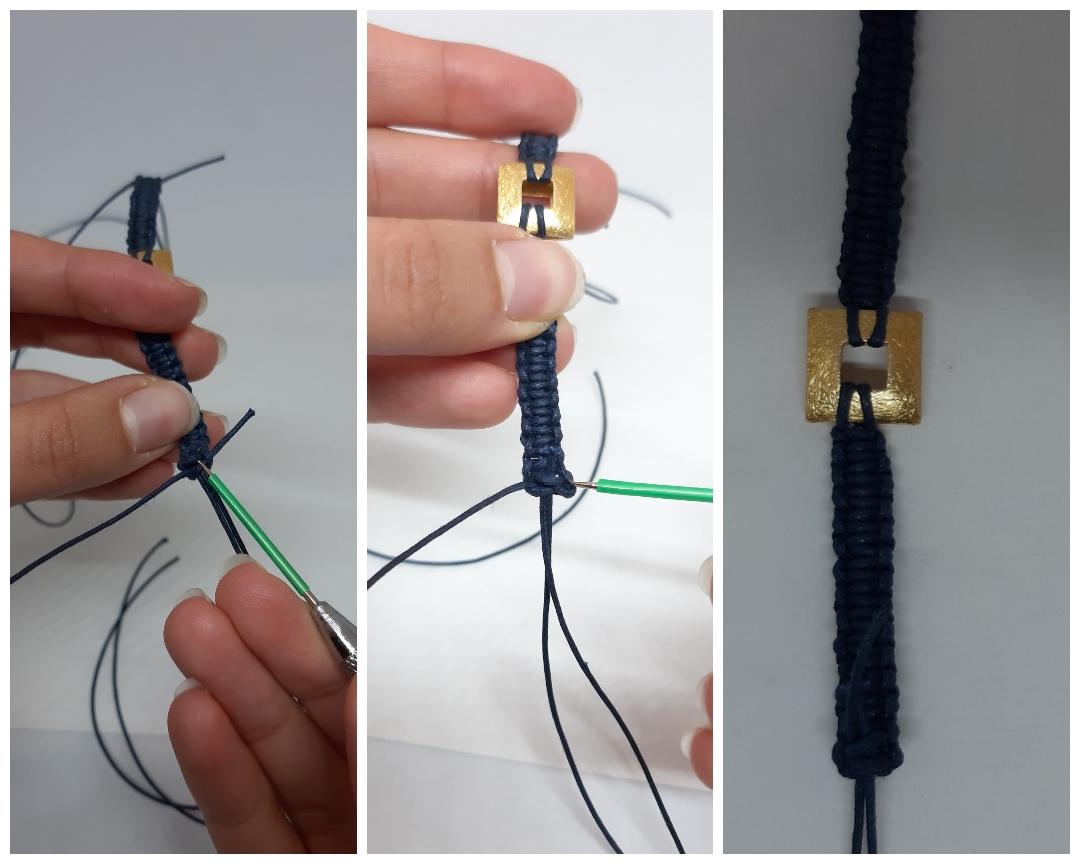
Step 4:
When you finish knotting, take the ends of the cord and insert them back 3 or 4 knots before. For that, you can either use a needle, or a tool to separate the knots and insert the cords. Cut the excess. Do the same on the other side you knotted.
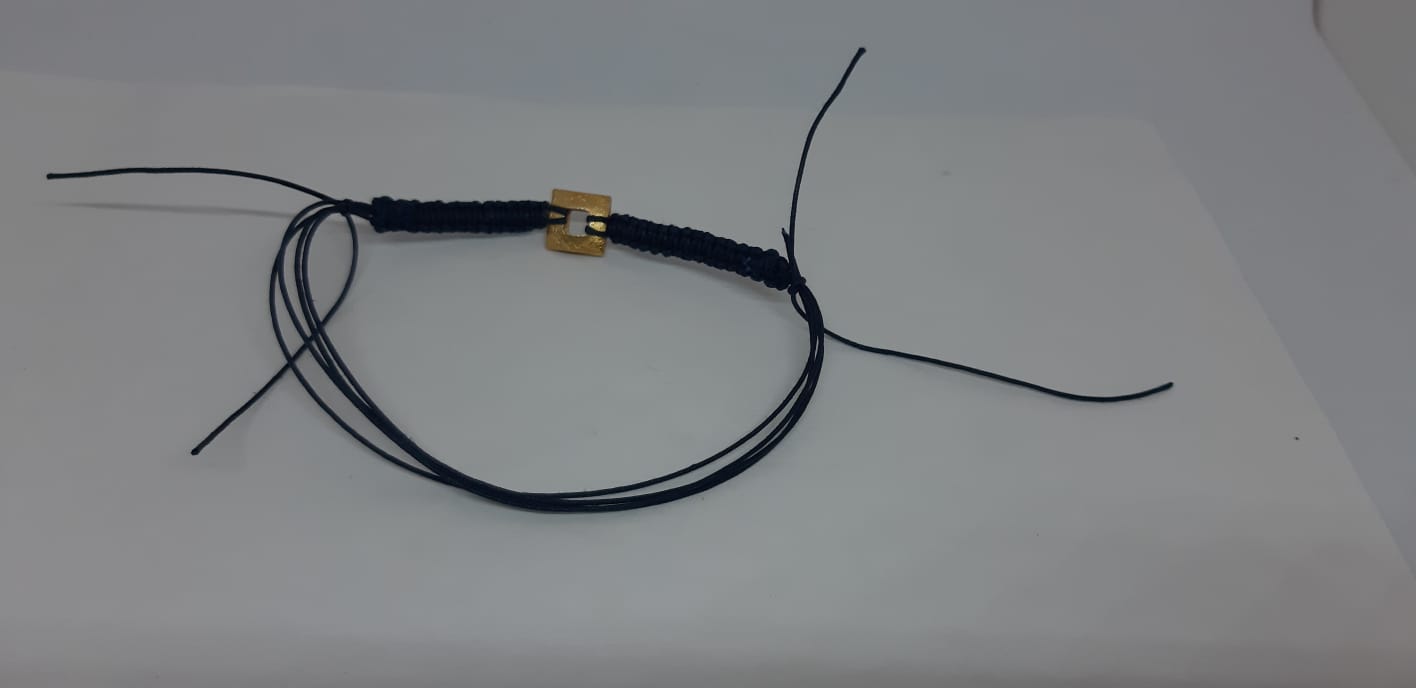
Step 5:
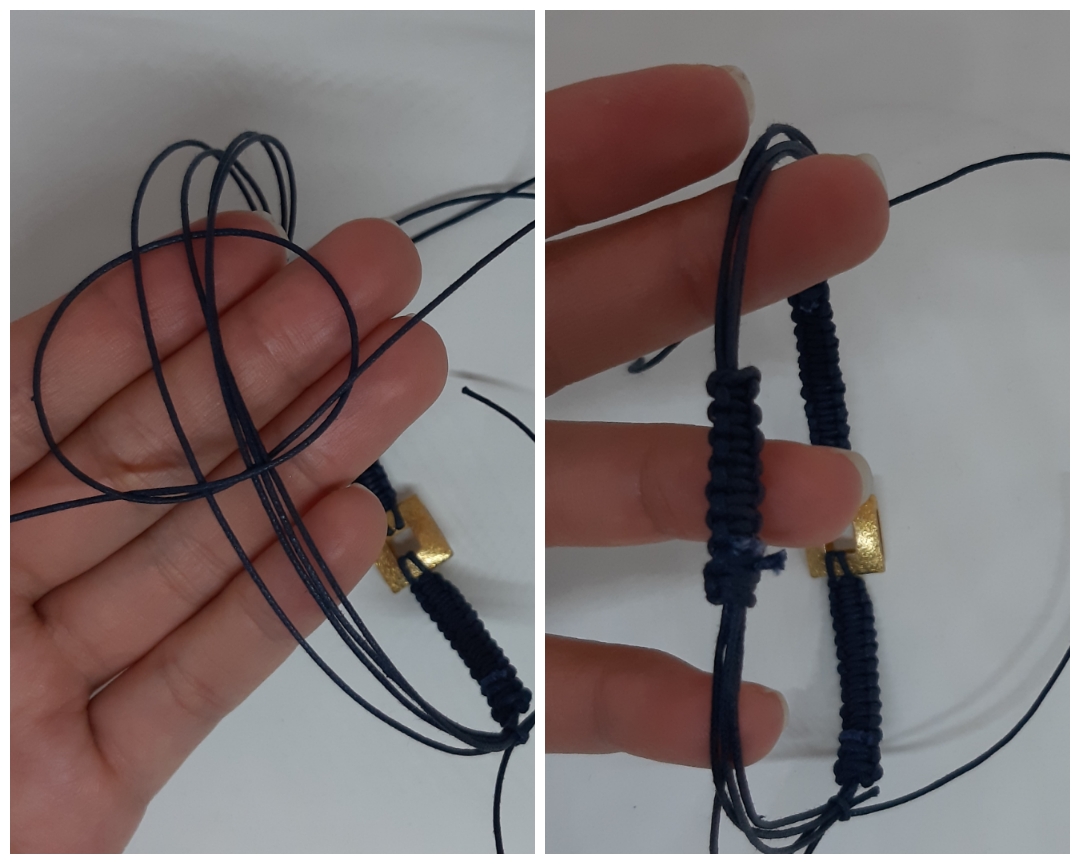
Now you’ll have to make the slide closure. For that, shape the bracelet as a circle by overlapping the two sides of it, and tie them temporarily using another cord.
Step 6:
Use the 25cm cord to knot macramé as explained in step 2 and 3. Start a little before the middle of the strands so the slide is centered in the bracelet. When you finish, close the knots as explained in step 4.
Step 7:
Untie the strands and adjust to fit the wrist and cut the extra. Knot the end of the strands.
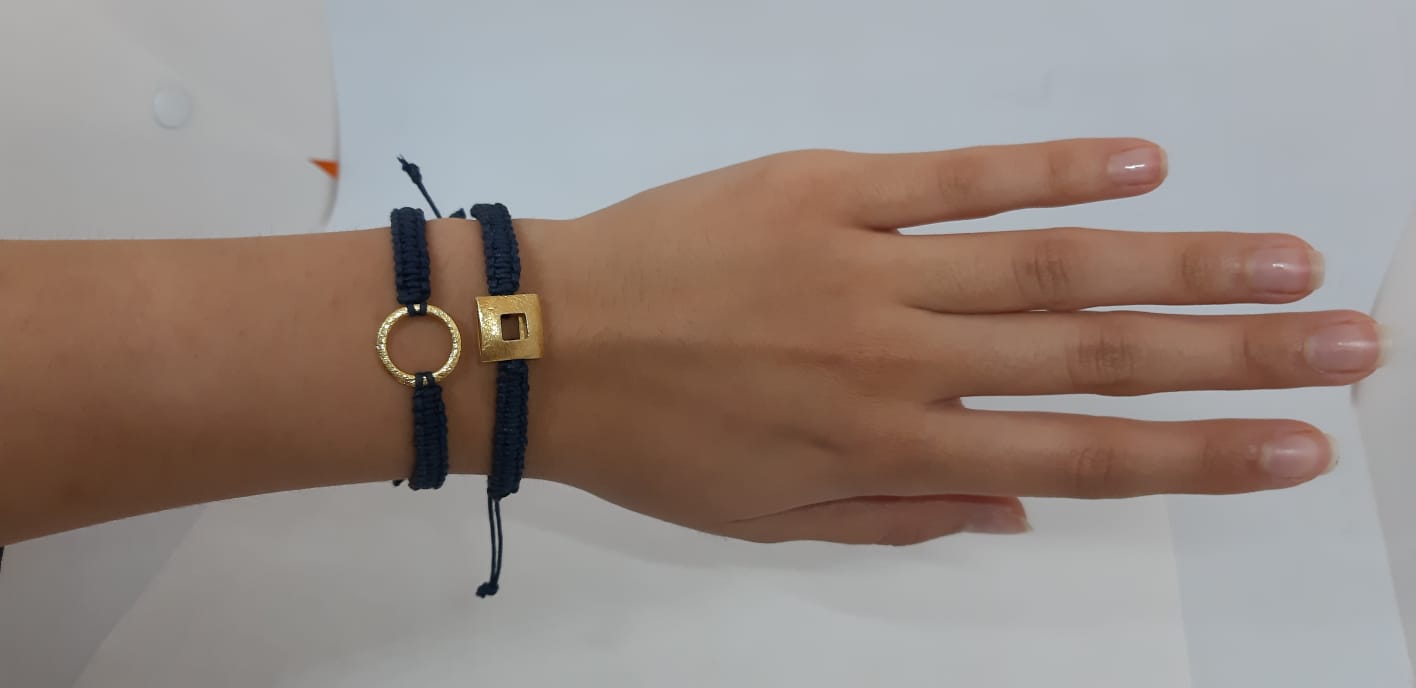
And that's it! Your macrame and charm bracelet is ready! It was worth it, right? We promise you it will become easier over the time.
Keep up for the following DIY!