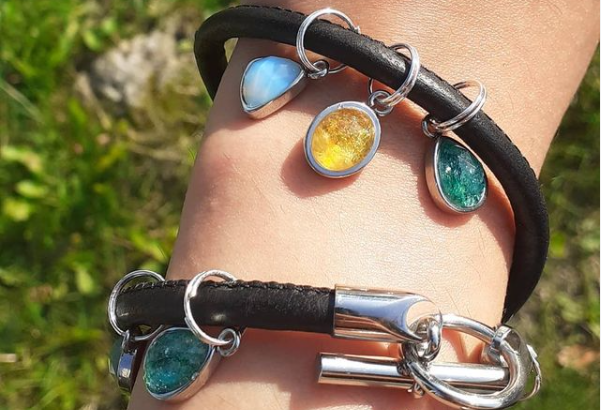
If you are a beginner in the jewelry making industry, or if you are already a professional who would like to look again into the basics, this blog is for you! Making leather and beads bracelet is very simple and yet can be tricky if you don’t know the tips. By following these 5 steps, you’ll be undefeatable in making the basic bracelets, and as you’ll see it’s very accessible in terms of difficulty.
You will need leather cords, beads, end parts, jump rings, clasps, glue and scissors.
Step 1:
Cut the leather cord you chose using a pair of scissors to create the main part of the bracelet. The average length to cut off is between 16.5cm and 19cm, depending on the person’s wrist.
Step 2:
Take one end part and put glue in it. Be careful not to put too much glue, it could exceed and be visible on your bracelet. Then take one extremity of your leather cord and insert it into the end part. Make sure the cord has reached the end of the end part to ensure maximum grip.
Step 3:
Now that you secured an extremity of your bracelet, add the beads you chose from the other extremity of the cord. You can add as many beads as you want.
Step 4:
Proceed as you did for step 2 but for the other extremity of the bracelet.
Step 5:
Take a jump ring and open it leaving a gap. Insert one part of the clasp into the ring and then attach the jump ring to one end part on the bracelet. Close the jump ring. Then take a second jump ring and open it the same way, insert the other part of the lock in it and attach it to the opposite end part of the bracelet. Close the jump ring.
Tada! Just as simple as that, now your bracelet is ready!